Getting Started with GIT and GITHUB
Hey people 😀 welcome to my new article. In this article I will take you to a journey which will help you in getting started with GIT and GITHUB 😎.

Why do we need GIT and GITHUB?
Before defining GIT and GitHub I would like to tell you guys about version control and the version control system. So, version control is the practice of tracking the changes made to files over time and a version control system is the environment or we can say software tools that will help us in keeping the track of the changes made to the files over time.
GIT:- It is a free and open-source version control system that allows us to maintain a history of our project or software code. As in, at what particular time, which person made what all changes, and at which part of the project or a software code
GitHub:- It is an online website that helps us to host our GIT repository. I will explain what is a GIT repository in a few minutes, so keep reading 😄.
Now, let's understand why we use GIT?
Let's say there is an organization that has been given a project to build an application. Now this organization will give this project to a team of developers who are good at building applications. Now this team of developers will distribute the project among themselves to work on different features which need to be there in the application.
All the developers are working on the same project but they are working on their personal computers. So, they will not be able to see what changes or features other developers have made. This is when we need a centralized system where we can host the software code so that everyone working on the project can see the software code and at the same time they can keep track of the progress of the project. So, this is where GIT and GitHub come into the picture to help the team to keep track of the progress of the project.
Different use case scenarios of GIT
Every developer can have an entire copy of the code on their local system.
Every developer can keep track of the changes made to the software code.
GIT allows developers to communicate regularly.
GIT allows collaboration between the team.
How GIT works?
GIT allows us to record the local changes made to our code using a command line tool such as "GIT shell". This command line interface (CLI) uses commands to view changes in the files and folders and to manage the files and folders with just a simple terminal.
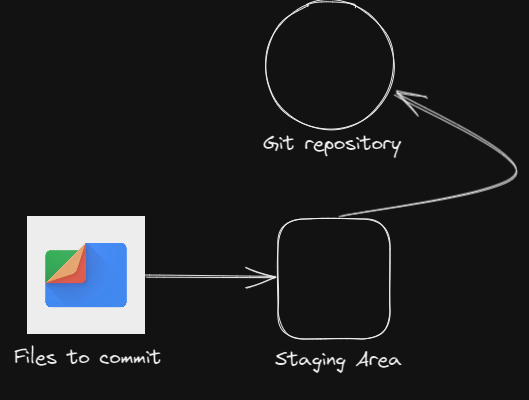
Let's say you have made some changes or you have added a few lines of code to your project and now you want to take a snapshot of that piece of code so that it can be stored in the version history of the project. In this case, you can simply add the files to the staging area and then commit those changes to the version history of the project (repository) using GIT. So, From this explanation, I have also explained what is a GIT repository? It is a folder in which the changes made to the project (version history of the project) are stored.
Now, let's discuss basic terminal commands that will help us while using GIT in the command line.
mkdir [directory-name]:- To make a new directory (folder) with a folder-name.
ls:- To list files in the current directory(folder)
cd [directory-name]:- To move to another directory named [directory-name].
Creating a GIT repository
- Let's say now we want to utilize GIT for our project. To do this, the first command we will run in the "GIT shell" command line is "git init" on the directory inside which our project is located. Now, once we run this command a hidden ".git" file inside the directory will be created. This file tracks the version history of the project and is what turns our project into a GIT repository.
Tracking changes
Let's say we have made a few changes to our project (added/removed some code). To track these changes we run the command git status in the "GIT shell" command line which shows what all changes are made in the project.
If we want to add these changes to the staging area we will run the command git add . or git add (file name). This command will add the changes we have made to the staging area.
After adding changes to the staging area if we want to commit those changes to the version history of our project then we can run git commit -m "[message]"
Now with these basic commands, we will be able to take snapshots of the changes made to the project and commit those changes to the version history of the project.
GitHub overview

GitHub is an online website to host GIT repositories and allows us to collaborate with developers all around the globe. We can use the GIT shell command line to upload our GIT repositories to GitHub. Let's see how to create an empty repository on GitHub and upload the GIT repository to GitHub with the help of GIT shell command line from the local system.
To host your GIT repository on GitHub you need to have a GitHub account. you can easily create your account by visiting https://github.com/
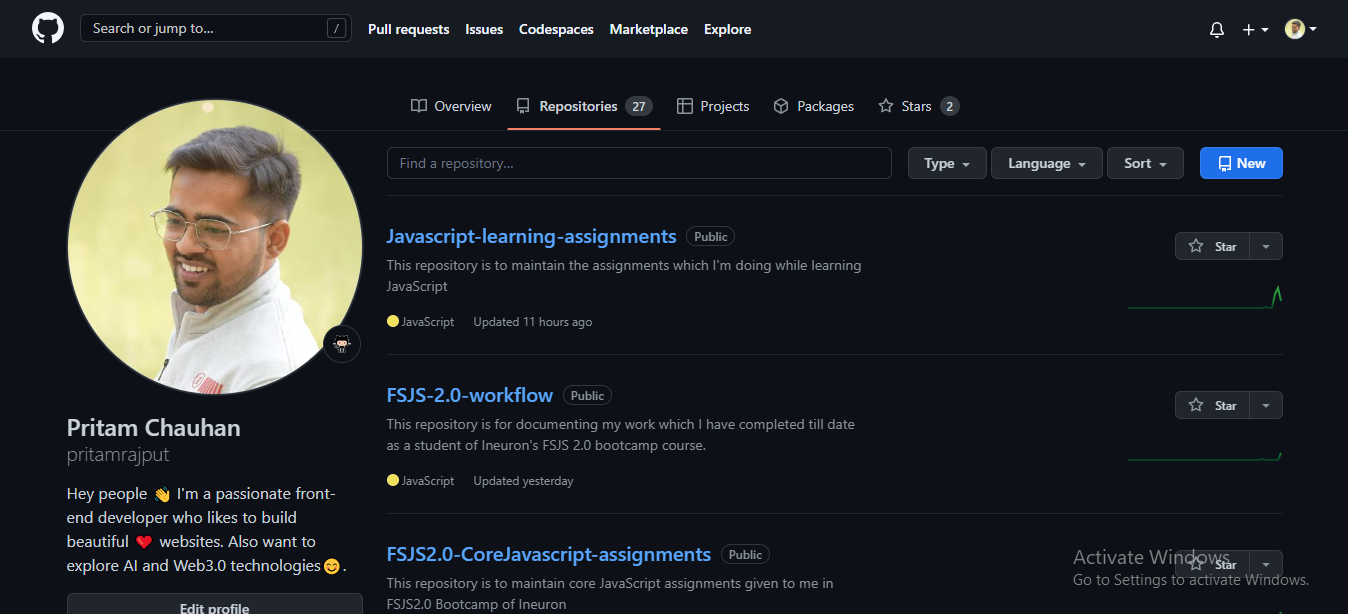
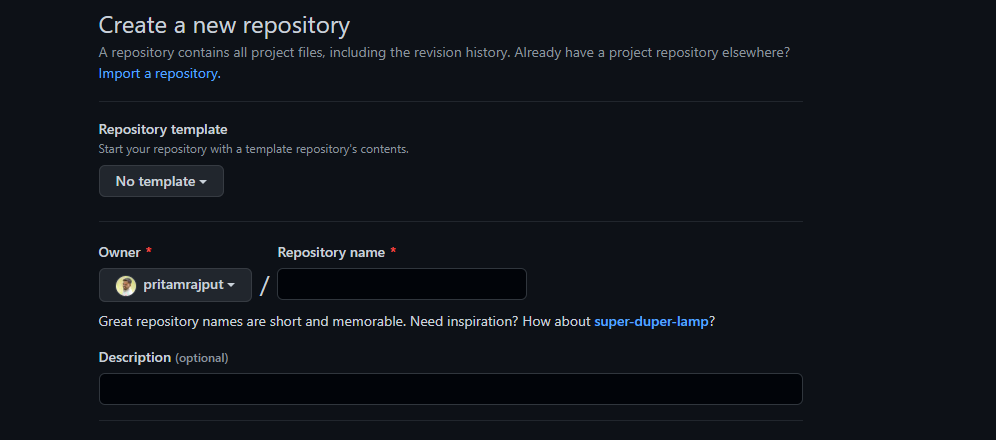
Now go to the repositories section and click on the "New" button which you can see in the above image and then you will see create a new repository page. You can give any name to the repository.
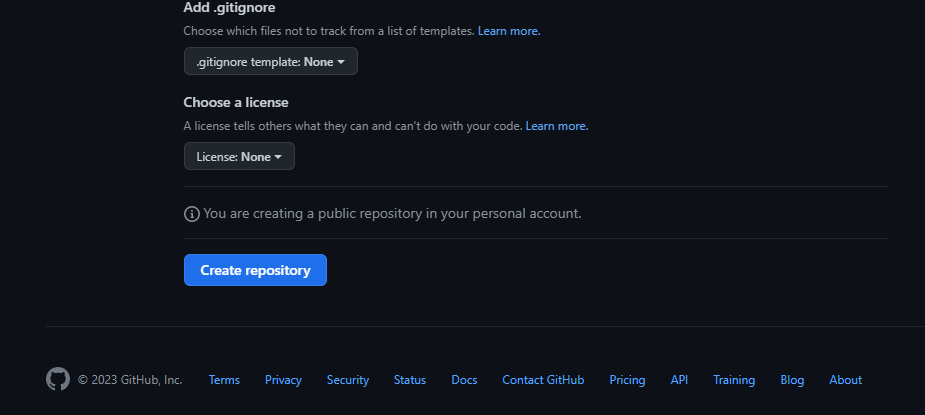
Now click on the create repository button and your repository on GitHub is created. Now just copy the URL of this newly created repository.
To upload GIT repository to GitHub we can write git remote add origin URL in the GIT shell command line. "origin" is the name given to the URL and URL is the copied URL when we created a repository on GitHub.
Now, run git remote -v command to see the URL attached to the GIT repository.
Now to push the GIT repository to GitHub, we can write git push origin master
"master" is the name of the branch to which we can want commit changes.
This is how we can push any changes made to the project to GitHub.
Conclusion
These are a few basic commands we need to know to get started with GIT and GitHub and start collaborating with people across the globe. There are more commands related to GIT shell which I will discuss in future articles 😀.
Hope you like reading this article and please give your valuable feedback in the comments to improve my writing. Stay Tuned for new articles. Till then, HAPPY LEARNING and HAPPY CODING🤓.


